The Tween Animation feature is one of the best available in the iSlide add-in. We called it Tween because it is short for "in-between". The iSlide Tween feature is the whole process of generating intermediate frames between 2 images or objects, making it looks like that the first image transforms smoothly into the second one. The iSlide add-in defines and calculates the frames and their properties, and the way they should move and transform during the whole "tweening" process.
Where is the Tween feature?
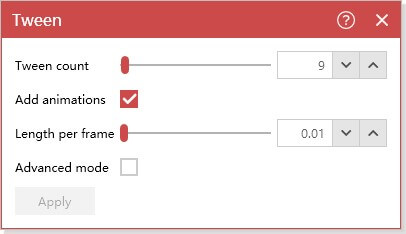
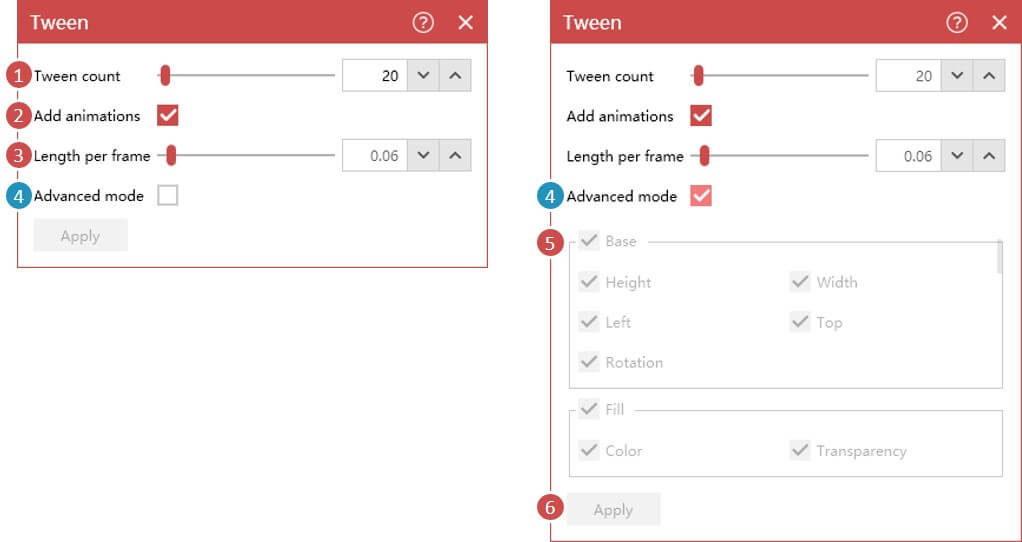
The iSlide Tween feature has a bright, interface with scroll bars and check boxes. We cannot make it easier for you!
You can find the Tween feature a little right from the center in the iSlide menu ribbon.
Tween parameter settings
1.) The number of intermediate frames between the objects. 2.) Checking this box will automatically generate the animation after the Tween. 3.) Length per frame or the unit duration of each frame in the animation. 4.) Advanced mode. 5.) Variations and parameters for the Tween. From height, to rotation, from colors to transparency. 6.) Apply button that starts the Tween.
This bouncing cylinder is the first example.
Follow the steps below, and see how easy it is to create an amazing Tween, with just a few clicks.
Just try it yourself and you will use it more often in your presentations soon!
Follow these steps...
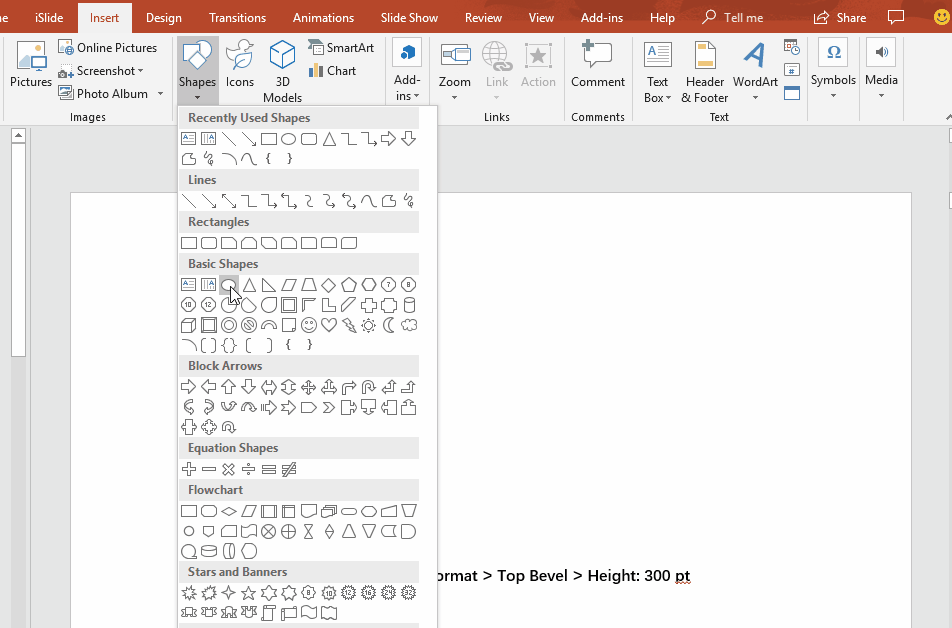
Insert an image, in this case a circle.
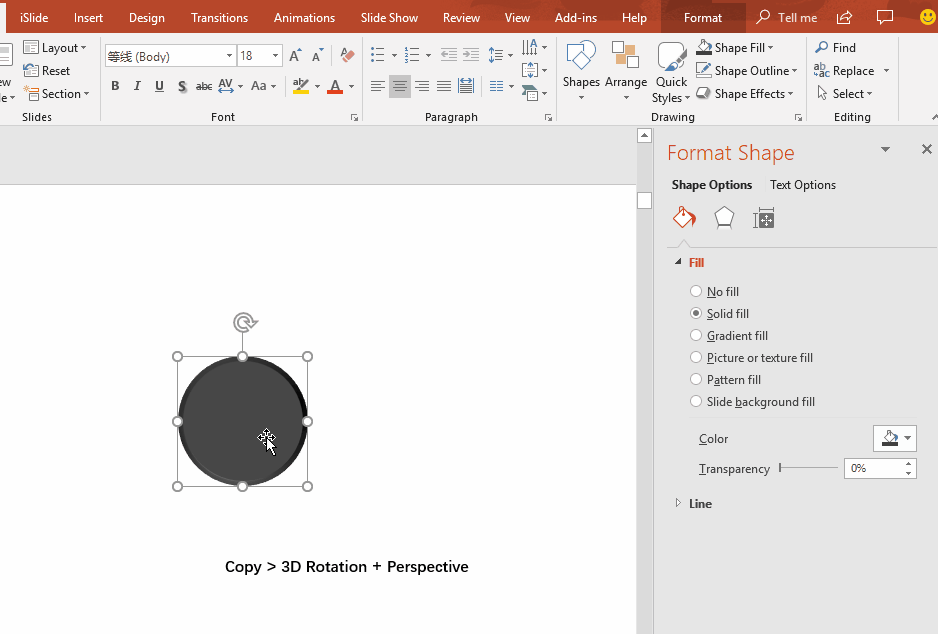
We changed the color here, to what you like.
Do not forget to set the outline to NO.
Choose format and shape effects.
3-D options and change the top level height to 300 pt.
Making the second cylinder
Copy this circle. we are sure you know how to do this...
Select the copy and choose the desired perspective values.
Do not forget to check if the X and Z rotation values are set automatically.
The final steps... Set the parameters for Tween Animation!
Select the 2 shapes and click the Tween. Now we start filling in the parameters and the duration of each in-between frames. In this case we use 40 and 0,02. experiment with the values!
Now align the shapes with the alignment tool. Select all the frames. Choose align center and align middle for instance. Now all the frames will overlap each other completely.
Run the slide (with F5) and take a look at your first Tween!
Tips:
1.) Use Ctrl+Z to undo the last action, adjust the values, and see what works best for your tween. 2.) If you are not using a smart diagram, use a cylinder to create custom graphics.
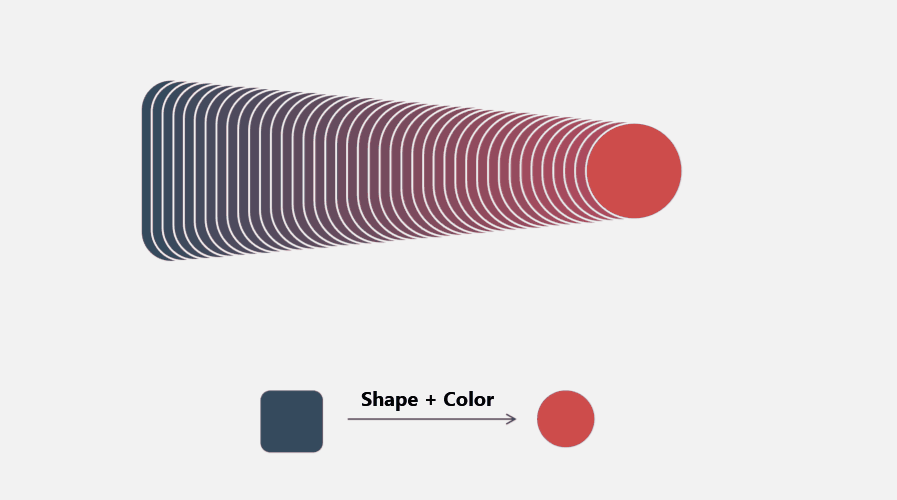
A Shape & Color example!
In this example we Tween the shape and the color.
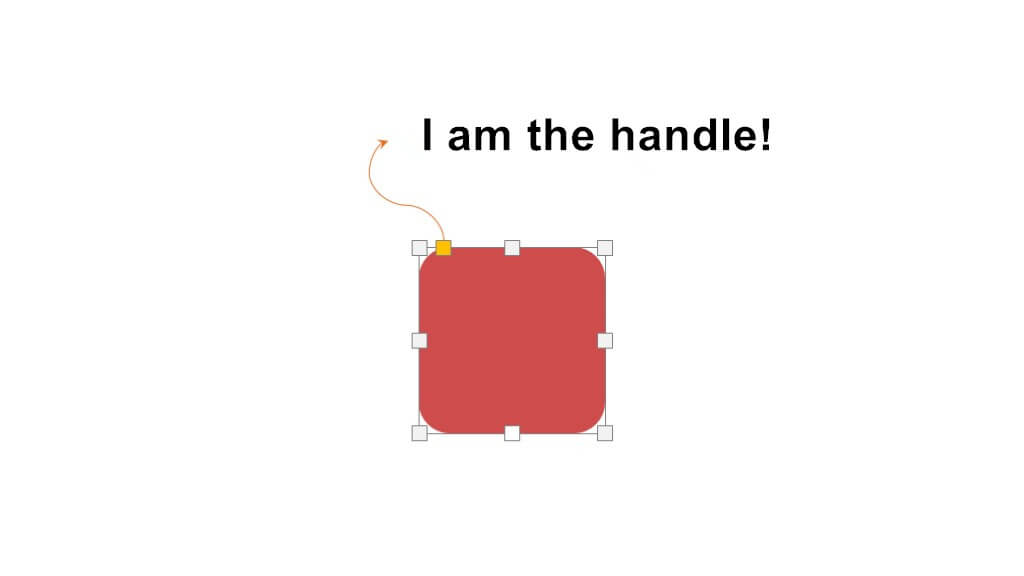
The steps are most likely explained above but, to create various animations you need to use the shape with the handle in the PowerPoint shape options. Just give it a try and you will see how easy it is!
Practice does it!
Left of this text is an example of a triangle transforming into an arrow in just one color.
You should be able to do this yourself now!
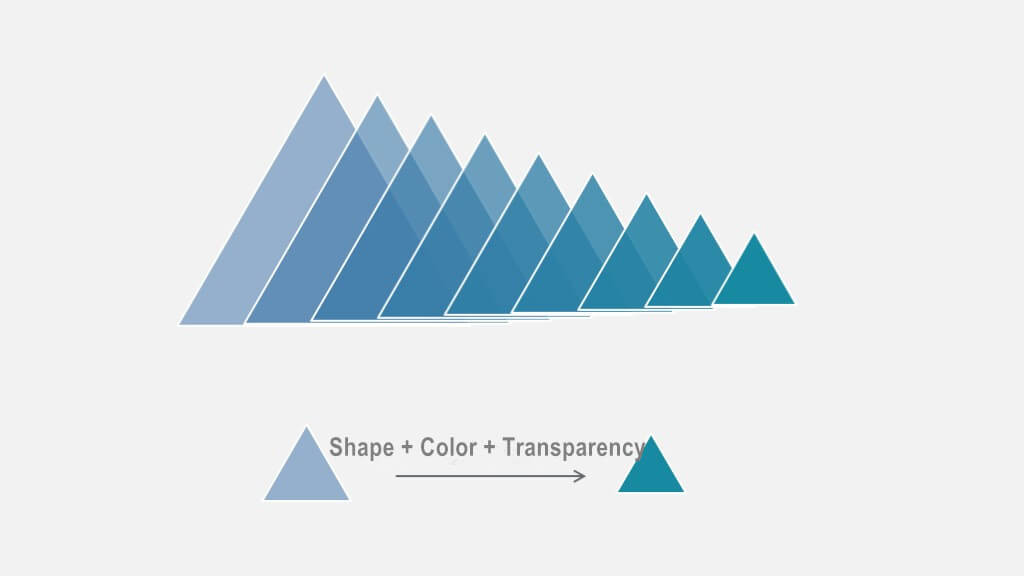
A shape, color andtransparency example!
Another nice exercise is this example. Make 2 triangles, set them to different colors and select both.
In the shape options, you can now select the transparency for both the fill and the line. Set it to 50% for instance and Tween!
Just use your imagination!
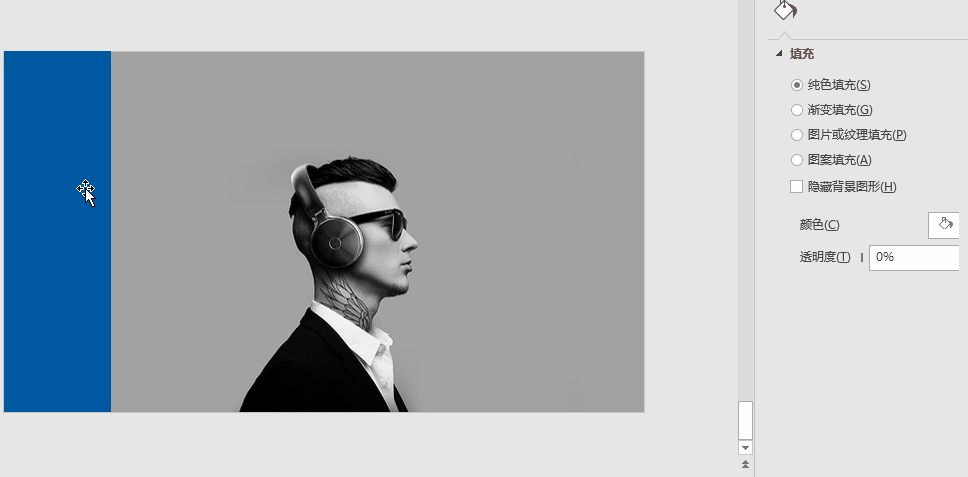
This gradient mask over a picture is even more simple. Transparency is only set on the second yellow shape, with 70%. No duration at all is used on applying this Tween!
Just use your imagination. You don't have to be a great designer to make amazing PowerPoint slides like this. It just needs a little practice.
The iSlide Tween does all the work for you!
See how easy it is to create beautiful PowerPoint slides? Try iSlide now!
")
")